Throughout the Architectural Communications course at UNSW, we were encouraged to explore new territories in drawing and model making through the completion of three studio classes throughout the term. The studios which I chose to complete were storyboarding(re)presenting representations by Meeray Ghaly and Haris Dzonlogic, the drawing and rendering workshop by Linda Markham-Lee and Prajakta Sane and the material modeling workshop by Nikolina Bobic and Laurice Elhaj.
Studio One - Storyboarding
At the beginning of this workshop, we were taken to Goldstein Courtyard and we were asked to explore the area and eventually model it in 3D. My partner and myself chose to explore the almost interior nature of the closed in courtyard and also the courtyards devoid nature and lack of human interaction. To do so, we enclosed perspex slides of negative aspects of the courtyard, such as the litter and the large trees that blocked off the sunlight, in thick balsa frames thus emphasizing the courtyards closed in nature. These slides were then glued together, to form an almost tunnel-vision-like view of the courtyard:

What was most enjoyable and exciting about this workshop was the opportunity it presented us to experiment with modelling and our ideas about architecture. Because there were no boundaries, it stretched our ability to understand even what we thought about a space. The studio also allowed me to experiment with balsa wood and perspex, the latter of which I had never used before for model making. Overall, it was a thought provoking workshop.
Studio Two - Drawing and Rendering
During the Drawing and Rendering studio, we were introduced to many rendering techniques and styles, which we were then asked to employ in order to render one of the five houses we were presented with. I chose to render the Jilbey House, because I found myself intrigued by its rectangular, yet light, structure.
The workshop was very challenging as it, for the first time in this course, encouraged and emphasized the importance of proper architectural hand drawing and the use of drawing equipment that this entailed. Also, it brought to focus the need to be able to hand draw and render houses to emphasize certain aspects of their design. I attempted to do this by layering 3 sheets of vellum and drawing over them with black felt tip pens and grey copics.

One of the main criticisms of the work which I produced was the inclusion of a dark shadow line in the plan, a mistake which I do acknowledge - it is, as I was told by Prajakta, too dark and draws the eye away from the thinner lines of the plan. However, despite this, I still believe that I have learnt a great deal through the completion of this studio.
Studio Three -Material Modelling
During the last studio I chose, a lot of emphasis was placed on not only modelling, but also the theoretical background behind architecture and the aesthetic world. We were encouraged to question and play around with our set ideas through the four week course.
During the second week, we were asked to represented a chosen text and architect or artist through a model made out of white mount board. I chose Herzog and De Meuron's vineyard and the text Power of Horror: An Essay on Abjection by Julia Kristeva.
The influence of Herzog and De Meuron's vineyard can be seen in the rectangular structure of the pieces, and in their intricate interiors which make reference to the lace-like facade of the building.
In terms of referencing the chosen text, it played with the ideas of abjection presented in Kirsteva's text, namely the act of rising from a deceased body.
For the third week presentation, we were asked to take photos of a walk through the city and to use these photos to create a poster about our experience. Throughout my walk through the city, I was struck by the enclosed feeling that the tall buildings of the street and the large trees of the parks offered. I attempted to portray this in my poster by pasting dark images around the outer rim with the center gradually growing lighter:
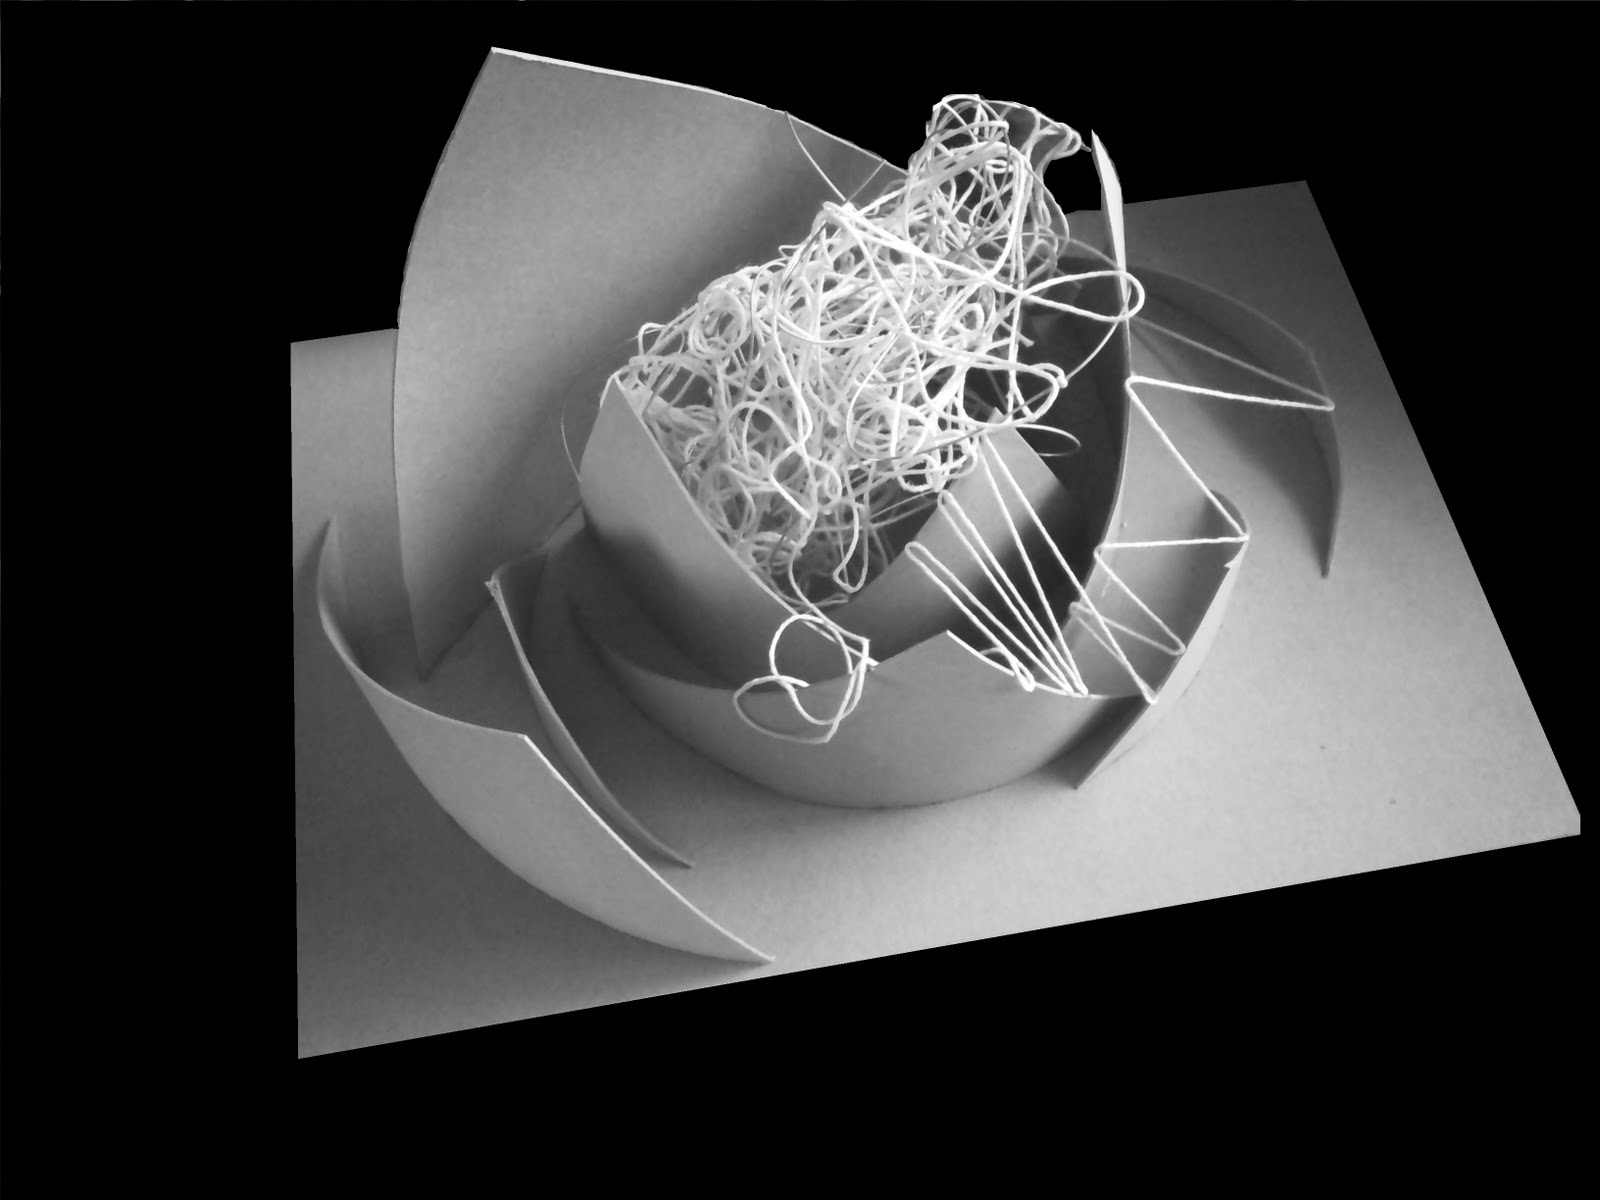
 From this poster, we were then expected to create a boxboard, string and wire model that expresses these ideas. I chose a more organic form than from my last week and used curved triangular shapes to represent the same enclosed form of the buildings.
 I attempted to portray the center the poster through the use of string and wire, a representation of the dense atmosphere of the city.

For the last week of the studio, we were asked to combine our thoughts about the workshop with one word from a list of 7 and to use these to produce a poster. I believe that the course had asked us to "think outside the box" and, in a sense, "broken the box" of model making. I combined this with the word "(de)constructing", and thus produced a poster filled with squares breaking and falling apart.

From this poster I made a balsa wood model which represents the same train of thought. The model can be read from left to right or right to left, thus either reading as a box being constructed or a box de-constructing.
Also, as the box deconstructs, it stands as a metaphor for "breaking the box", an aspect of my poster.

I believe that this model is the strongest creation which I have completed throughout the three workshops.
Overall, the workshop was much like the first one I completed in the sense that it was very freeing and we were encouraged to explore different and interesting ideas. Also, the requirement that we had to present our ideas verbally has helped me, as I have very poor skills in that field.
Thus, conclusively, the Architectural Communications course was very interesting to complete, as it allowed one to experiment with many fields of architectural representation.
 The iceberg questions the perception of a real landscape - a distorted depiction of land, made more fluid and poetic through its formation.